If you want a fast way to sketch melodies, clean up note data, or tweak a converted MIDI track without opening a full desktop DAW, MusicMaker AI’s browser-based MIDI editor is an easy place to start. The tool is designed for people who want to work directly in a piano-roll interface, hear changes quickly, and export their results for use in a larger production workflow.
In this guide, we will walk through how to use MusicMaker AI’s online MIDI editor, explain the main parts of the interface, and show how it fits naturally into a wider workflow that includes audio conversion, lyric generation, and music idea development. We will also point you to a useful companion read: How to Convert Audio to MIDI with AI: A Guide to Audio-to-MIDI Workflow.
Why Use MusicMaker AI’s MIDI Editor?
A good MIDI editor does not need to be complicated. For many creators, the real priority is speed: opening a file, correcting a few notes, adjusting rhythm, changing note length, and exporting the result. That is where MusicMaker AI’s free MIDI editor is especially useful.
Because it runs in the browser, you can start working right away instead of spending time installing software or setting up a full production session. This makes it practical for beginners who want to learn piano-roll editing, songwriters who need to test a melodic phrase, and producers who simply want a lightweight MIDI file editor for quick revisions.
It is also useful in a modern AI-assisted workflow. Maybe you start with a melody idea, convert an audio phrase into MIDI, or generate a rough musical concept elsewhere. Once the MIDI data exists, the next step is almost always refinement. A browser-based editor lets you make those refinements quickly.
How to Open the Tool and Start a Project
The first step is simple: open MusicMaker AI’s online MIDI editor in your browser. From there, you can begin a new project or bring in MIDI content you already have.
A typical starting workflow looks like this:
- Open the editor page.
- Decide whether you want to start from scratch or import an existing MIDI file.
- Choose an instrument sound for playback.
- Place notes manually or edit the imported data.
- Preview the phrase and refine it.
- Export the result when you are done.
This is one reason many users look for an online MIDI editor free of unnecessary setup. When the goal is arranging and correcting note information rather than full audio mixing, a focused web tool can be much more efficient.
A Quick Tour of the Interface
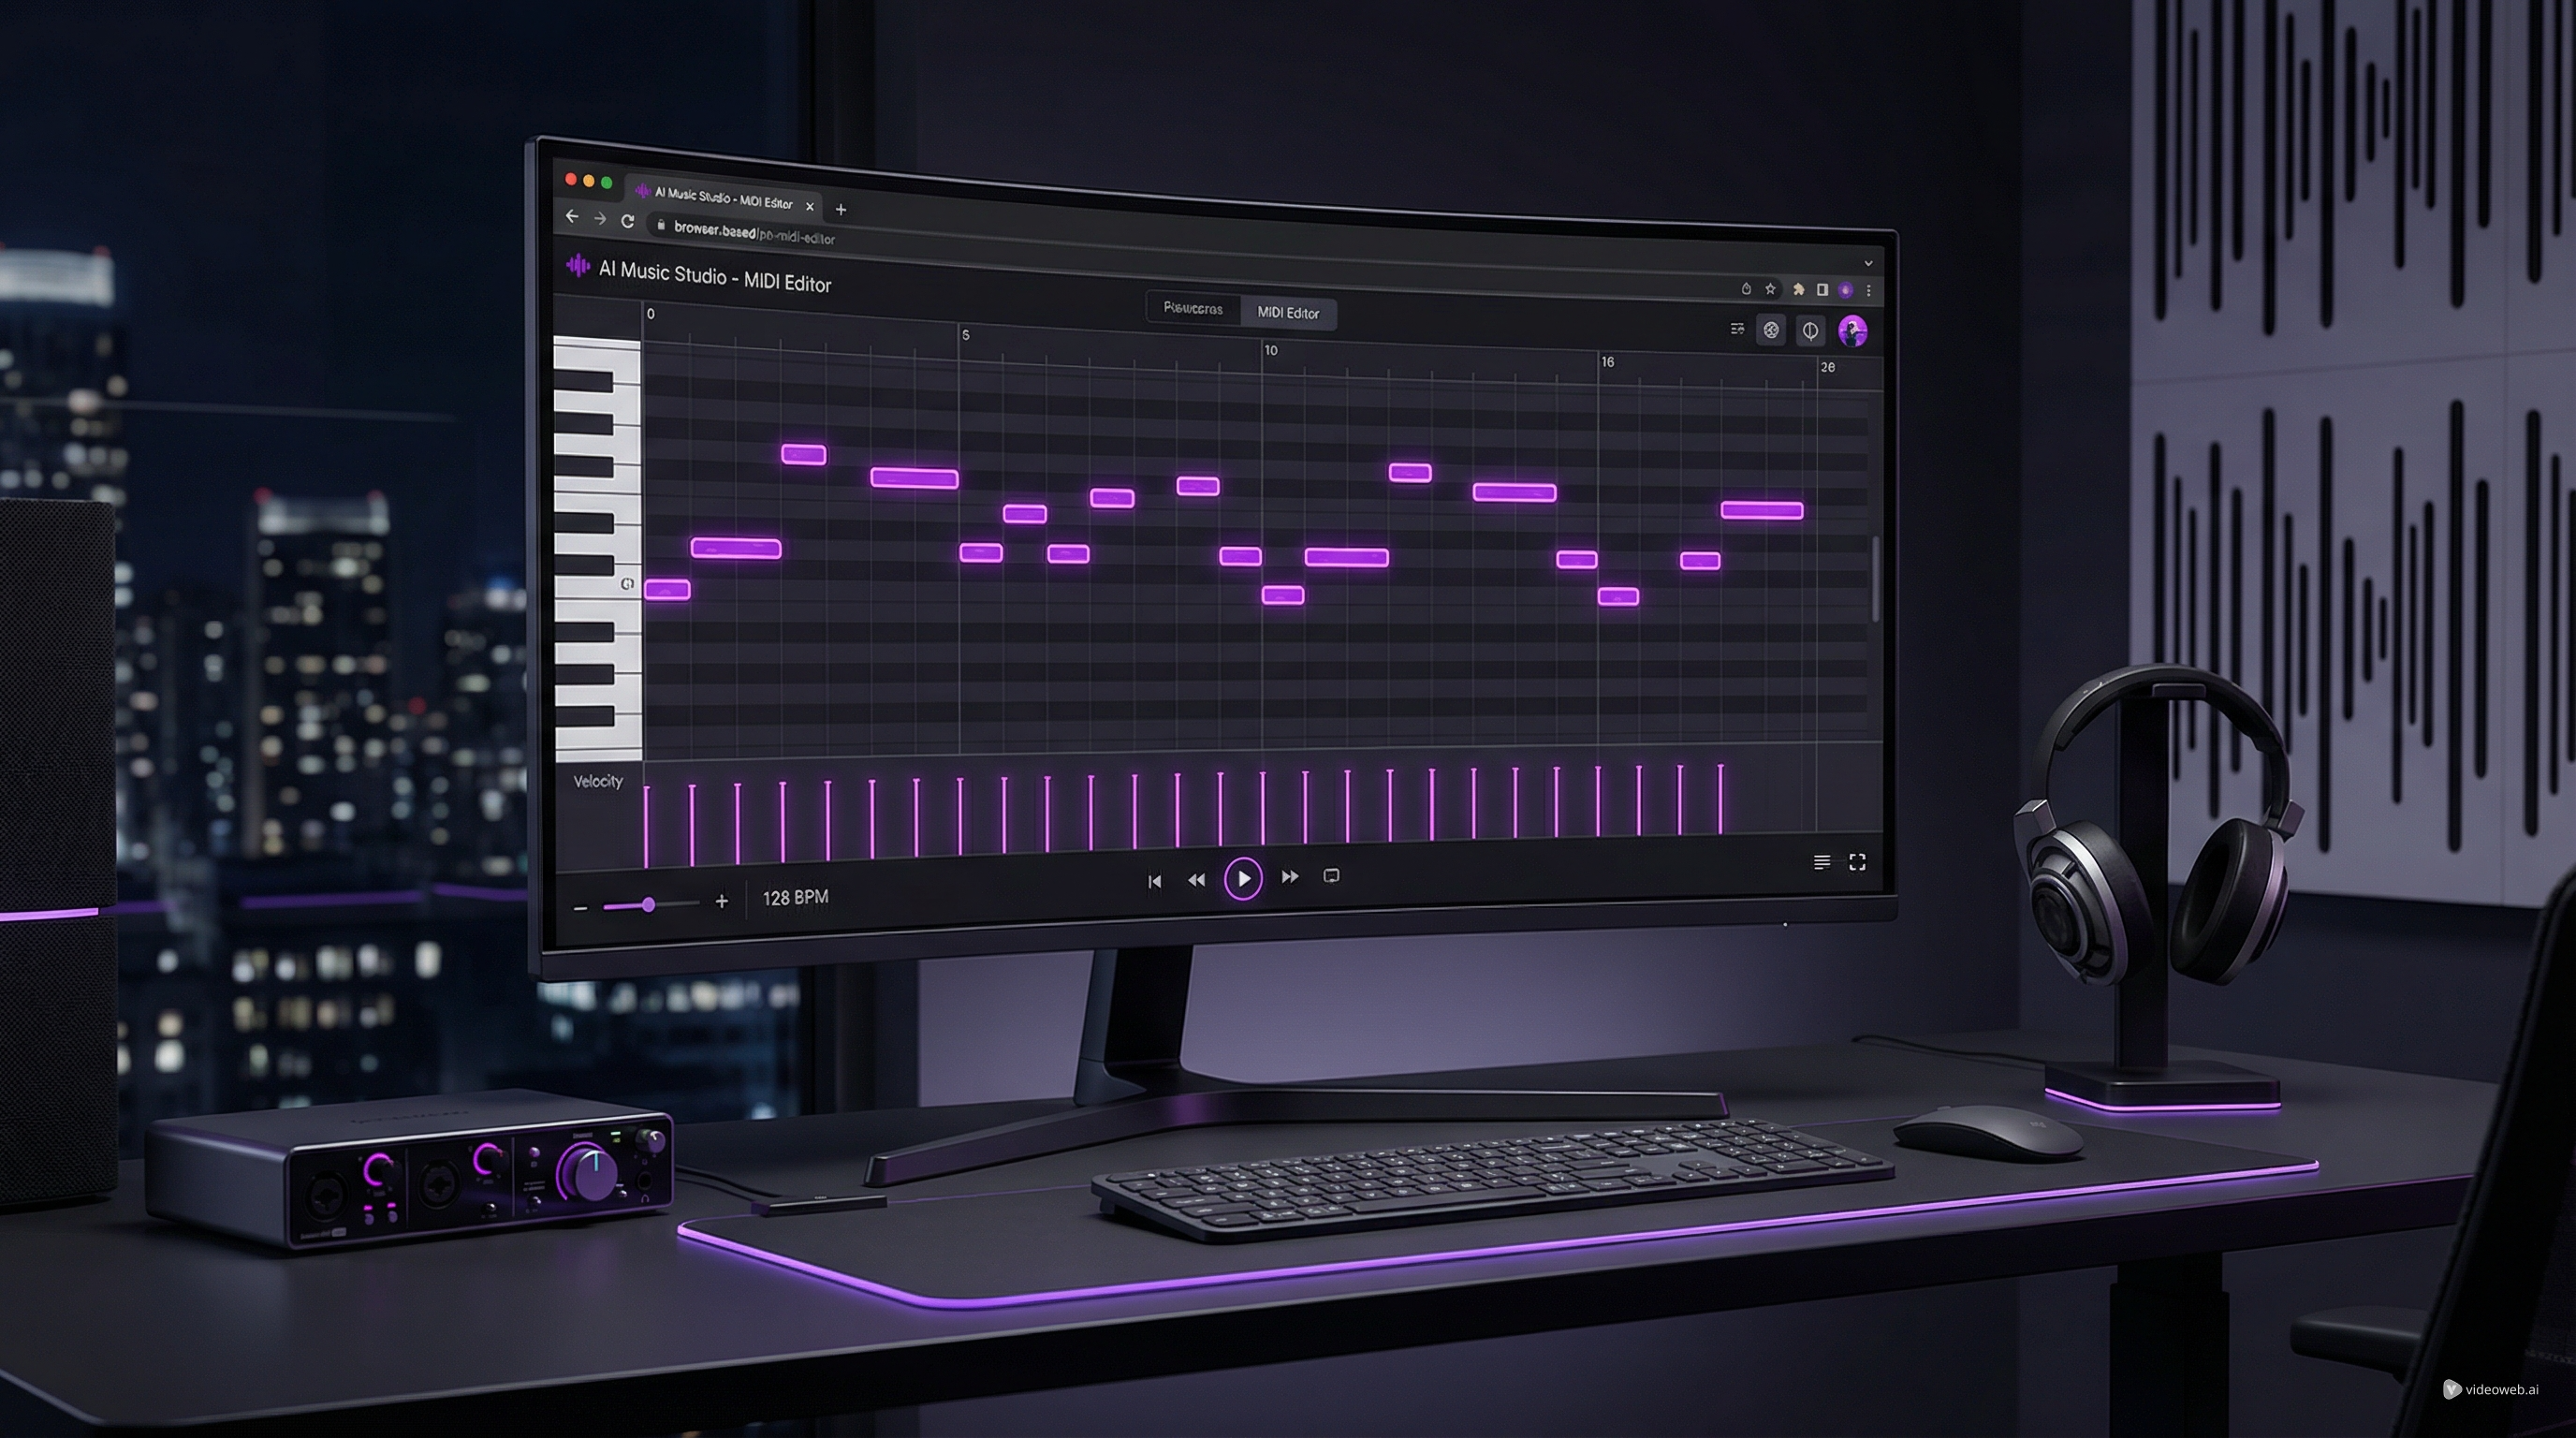
At first glance, the editor looks familiar if you have ever used a DAW piano roll, but it is still approachable for new users. The screen is organized into a few clear areas that support both composition and editing.
The left-side piano keyboard
On the left, you can see a vertical piano keyboard. This acts as a pitch guide, helping you understand where each note sits. When you place or move notes, the keyboard gives immediate visual context for melody and harmony.
The central piano-roll grid
The large center area is where most of the work happens. This is the piano roll: a timeline-based grid where pitch runs vertically and time runs horizontally. You can place notes, drag them to new pitches, move them forward or backward in time, and change their duration.
For anyone searching for the best MIDI editor for simple idea work, this is the key feature. The piano roll makes note editing visual and intuitive.
Track and instrument area
Near the top of the editing area, you can see the current track and instrument selection. In the interface shown, the selected sound is an acoustic grand piano. This section helps you manage what you are editing and what sound you hear during playback.
Top editing controls
The top bar includes controls for view and arrangement, plus musical parameters such as tempo. You can also see volume and pan controls. These settings help shape playback and make it easier to hear your sequence in a more musical way while you edit.
Bottom expression and control lanes
The lower section shows editable lanes for note-related parameters such as velocity, pitch bend, volume, pan position, expression, hold pedal, and modulation. This is an important part of what turns a rough MIDI sketch into something more expressive.
If you only use note placement, your sequence may feel flat. Once you adjust velocity and expression, the same idea can sound much more natural.
Playback and transport controls
At the bottom center, you get transport controls for previewing your work. These let you play, stop, and move through the timeline. BPM and timing display are also visible, which helps you keep the sequence aligned to the tempo you want.
Together, these parts make the tool feel like a practical free MIDI file editor rather than just a basic note pad.
How to Edit MIDI Step by Step
Once your project is open, the actual editing process is straightforward.
Step 1: Add or import MIDI content
You can begin with a blank grid or import an existing file. If you already have a melody, drum pattern, or converted performance, bringing it into the editor saves time.
Step 2: Add notes in the piano roll
Click into the piano roll to create notes. Each note appears as a block. Its vertical position controls pitch, and its horizontal position controls when it plays.
Step 3: Fix pitch and timing
If a note is wrong, drag it up or down to change pitch. If it starts too early or too late, drag it left or right. This is one of the most common uses of a MIDI file editor: correcting mistakes without re-recording a part.
Step 4: Adjust note length
You can usually extend or shorten each note block to control duration. Shorter notes feel more detached; longer notes feel smoother or more sustained. This is especially useful for piano, synth, and string-like phrasing.
Step 5: Edit velocity for dynamics
In the lower lane, adjust velocity values to make some notes hit harder and others sound softer. Even a simple melody becomes more convincing when the note strengths are not identical.
Step 6: Preview and refine
Use the transport controls to listen back. Then make small corrections until the phrase feels right. The fast preview cycle is one of the main advantages of using a browser-based MIDI editor free.
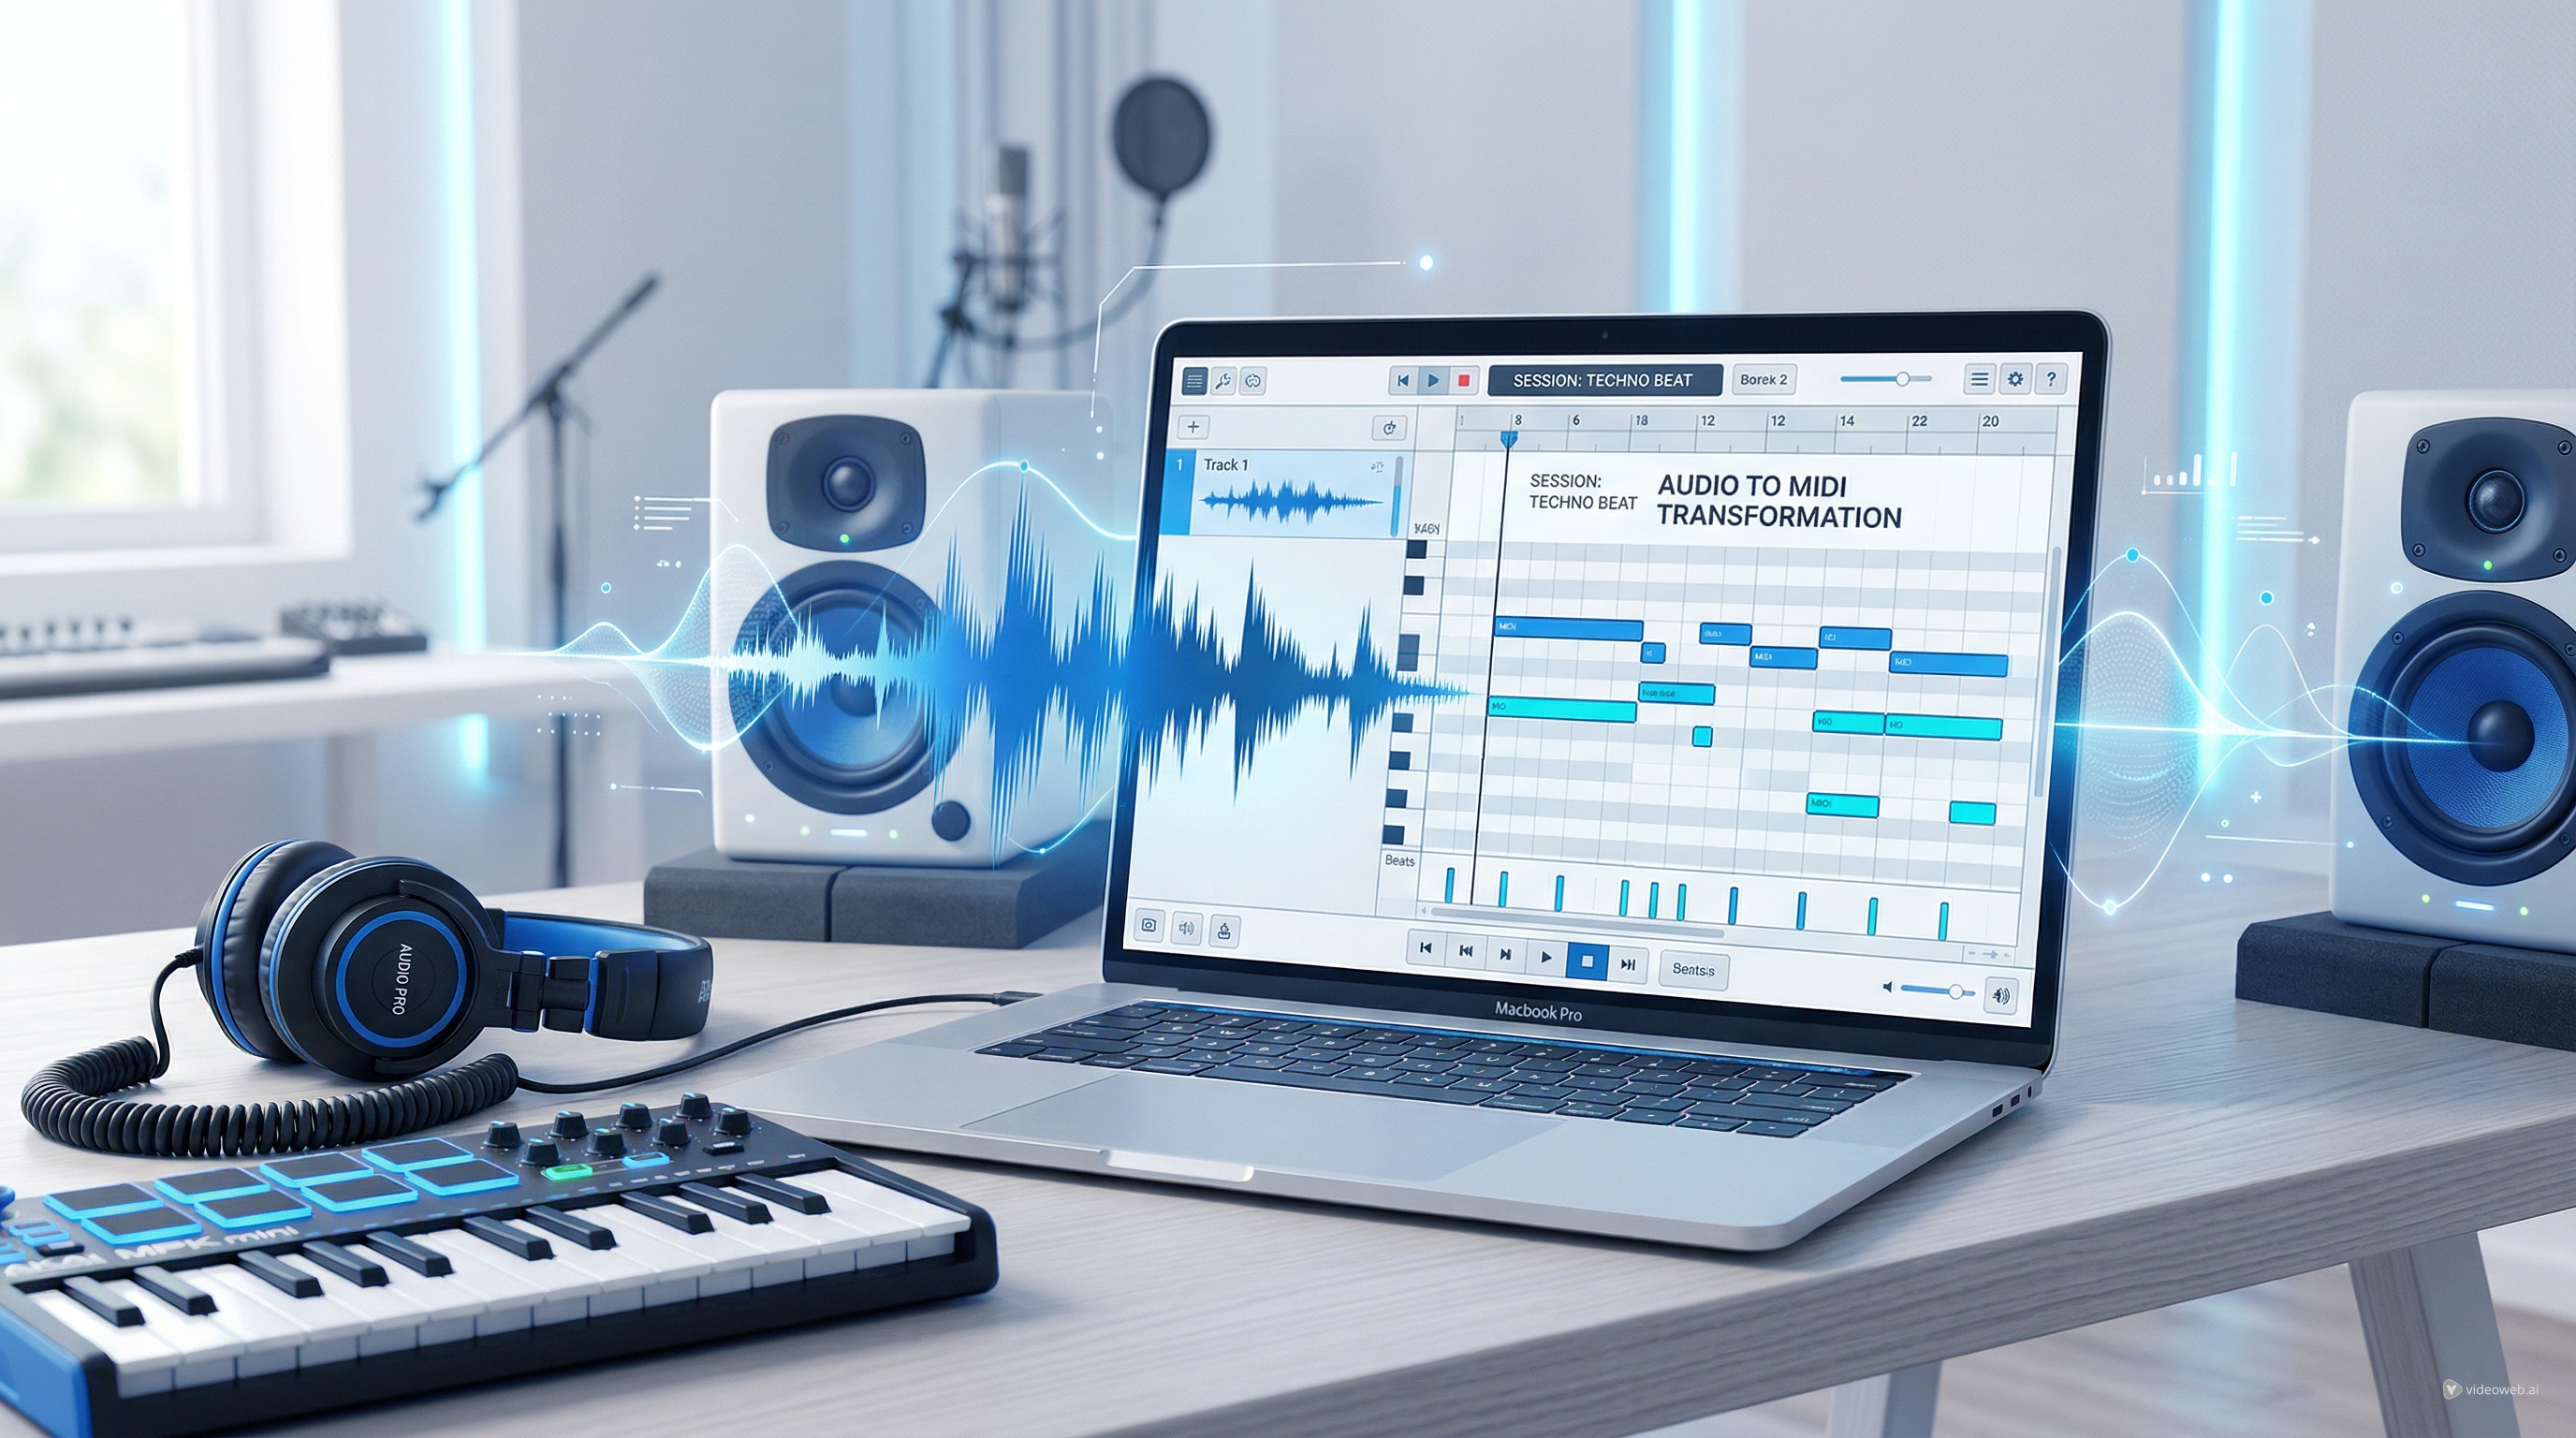
Why This Works Well with Audio-to-MIDI Conversion
One of the smartest ways to use the editor is after transcription. If you record a sung melody, play a phrase on an instrument, or convert audio into MIDI, the result often needs cleanup. That is exactly where this editor becomes valuable.
MusicMaker AI’s companion article, How to Convert Audio to MIDI with AI: A Guide to Audio-to-MIDI Workflow, fits naturally here. The conversion stage gives you the raw note information, while the editor lets you refine pitch accuracy, rhythm placement, note lengths, and expression.
In other words, audio-to-MIDI gives you the draft, and the editor helps you turn that draft into something usable.
A practical workflow might look like this:
- Convert a vocal or instrumental phrase into MIDI.
- Open the result in MusicMaker AI’s online MIDI editor.
- Correct any wrong notes.
- Tighten timing.
- Adjust velocity for realism.
- Export the cleaned-up MIDI into your DAW or arrangement workflow.
For beginners, this is also a great learning process. You can see how a performed phrase translates into note blocks, which helps build intuition for melody, rhythm, and phrasing.
Tips for Getting Better Results
To make the most of the tool, keep these habits in mind.
First, work in short sections. Editing four bars carefully is often more productive than trying to fix an entire track at once.
Second, listen for feel, not just correctness. A note may be technically on the grid but still sound stiff. Slight rhythm and velocity changes can make a big difference.
Third, use the piano sound as a neutral starting point. It makes pitch and timing issues easier to hear clearly before you move the MIDI into another instrument.
Fourth, think of the editor as a drafting tool. It is ideal for writing, correcting, and shaping ideas before moving into final production.
Exporting Your MIDI and Building a Bigger Workflow
Once your edit is finished, export the MIDI file and continue wherever you want: a DAW, a scoring tool, a virtual instrument setup, or another AI-assisted workflow.
That is why MusicMaker AI’s tool is more than just a convenient free MIDI editor. It can act as a bridge between idea generation and full production. You can sketch in the browser, correct in the piano roll, and then carry the file into a larger creative environment.
For many users, that balance is exactly what makes it appealing. It is accessible enough for beginners, but still useful for creators who already know what they want from a quick-edit MIDI workflow.
Final Thoughts
If you want a simple way to edit notes, clean up timing, and shape expressive MIDI data without opening a heavyweight music program, MusicMaker AI’s best MIDI editor for quick browser work is a strong option to try.
Its interface is clear, the piano-roll workflow is familiar, and the editing path is straightforward: import or create, adjust notes, refine dynamics, preview, and export. Paired with the Audio-to-MIDI guide, it becomes even more useful, especially for creators who want an efficient path from recorded idea to editable composition.
Whether you are fixing a melody, testing a chord phrase, or refining transcription results, MusicMaker AI offers a practical way to work with MIDI directly online.
Recommended Tools and Models on MusicMaker AI
Useful tools to mention
- Audio to MIDI Converter for turning recorded ideas into editable note data.
- AI Lyrics Generator for writing lyric drafts before arranging music.
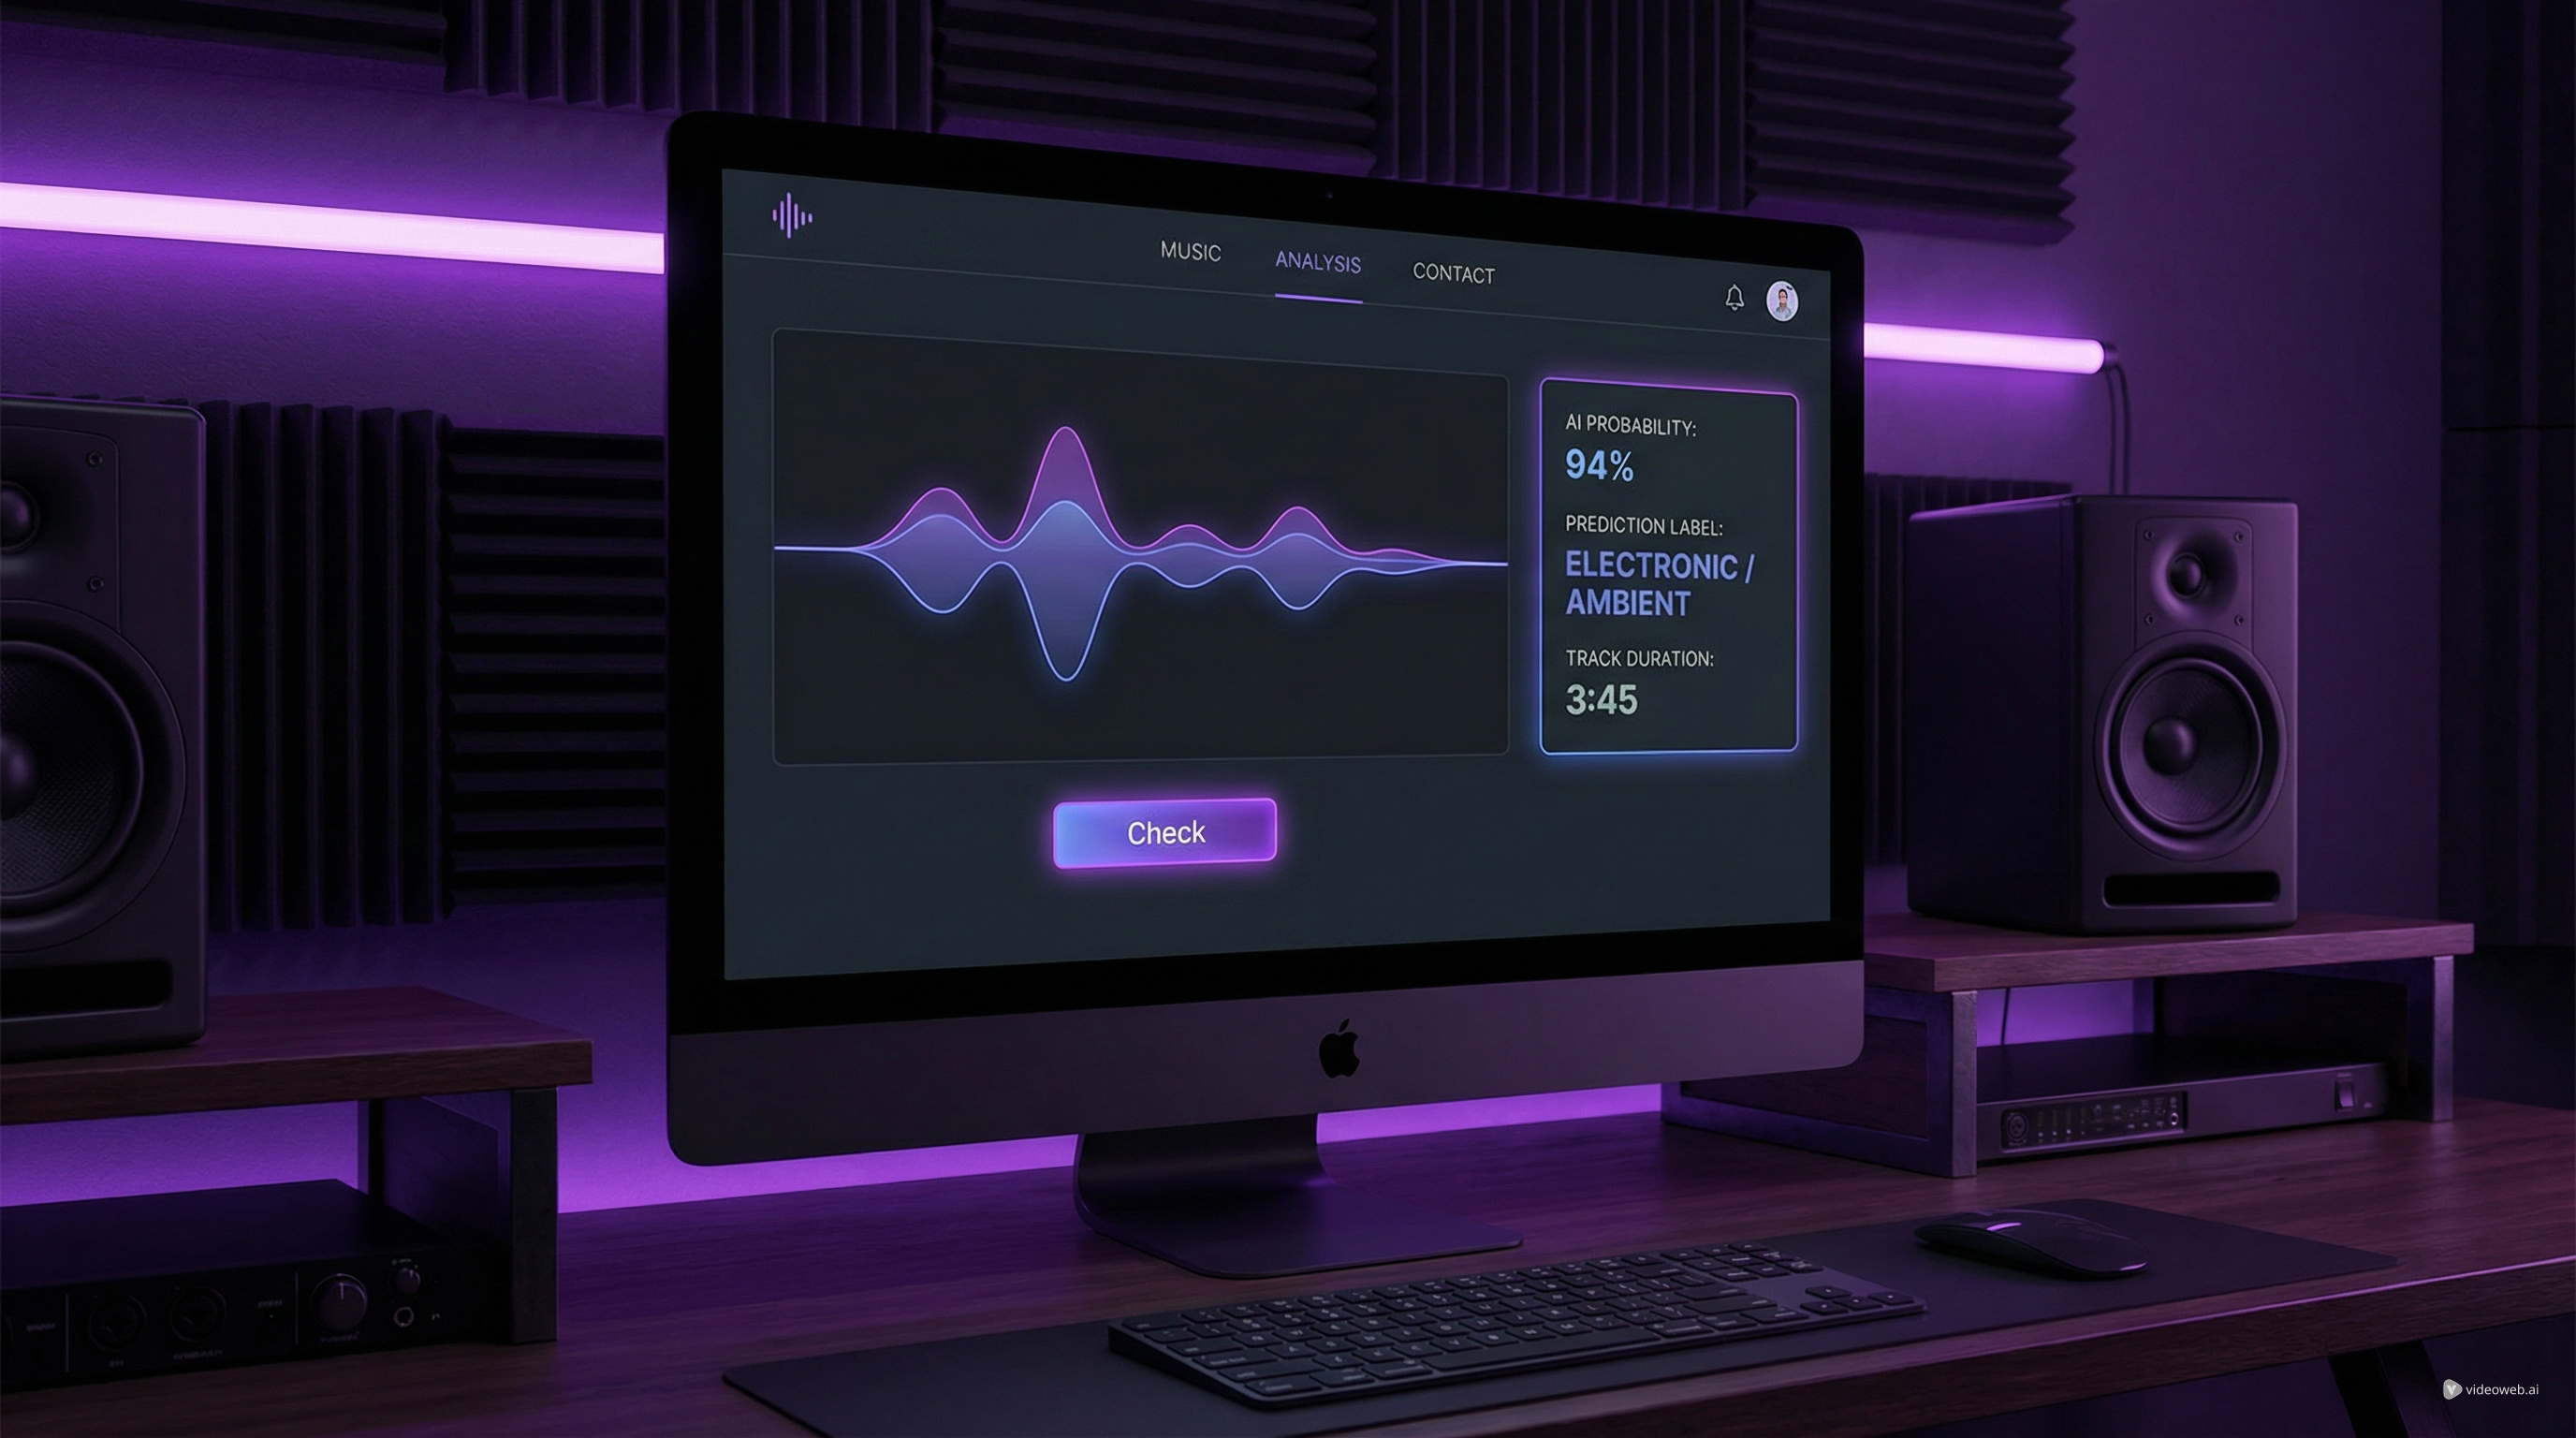
- Music to Text for turning audio into descriptive or analytical text.
- AI Music Checker for checking whether music may be AI-generated.
- Free Audio Converter for preparing source files before transcription or editing.
Models or creation options to mention briefly
- Music AI for general AI music creation workflows.
- Music 4.0 for music generation use cases.
- Music 4.5 or 4.5+ for more advanced or updated generation options.
- Music 5.0 for newer generation workflows on the platform.
Related Article
- How to Convert Audio to MIDI with AI: A Guide to Audio-to-MIDI Workflow
- How to Use a Free AI Music Checker: Detecting AI-Generated Songs for Free
- Turn Sound Into Meaning: The Future of AI Music-to-Text Conversion
- AI Music Generator for Music Creator AI: How to Turn Ideas Into Finished Tracks